
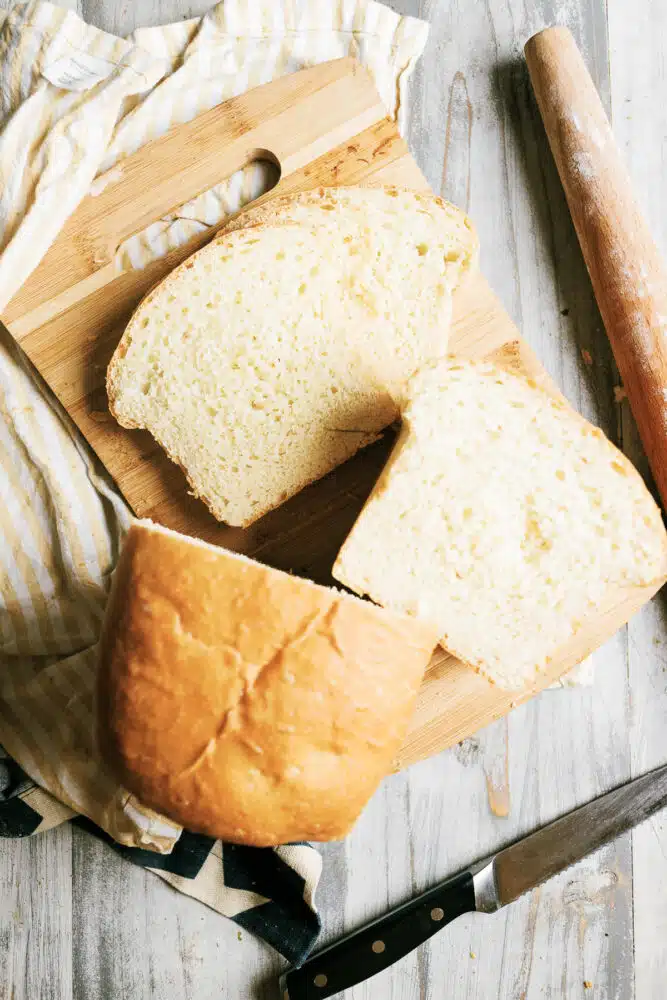
Light and Fluffy White Bread
(
REVIEWS)
PREP:
2 hours
TOTAL:
3 hours
SERVES:
1

This post contains affiliate links for products that I use. I earn a commision on these links with no cost to you.
Do you remember when you could get a decent loaf of white bread at the grocery store for around a buck or two?
I do. Because I’m a geriatric millennial.
If you’re like me, you’ve stocked up on yeast over the last couple of years out of post-pandemic trauma.
Then never used it.
I’ve made it a goal this year to make homemade bread more often as a way to save some money as well as put better quality ingredients on the table for the family.
In this post, I’ll go over what is needed for a good white bread recipe, steps to make it, as well as a few troubleshooting steps to take when your bread goes wrong.
Yes. It will go wrong.
Welcome to bread making. It’s a journey. A learning experience. But, its rewarding.
Once you get a handle on bread making (especially sourdough bread making), you’ll never by store-bought bread again!

What are the basic ingredients for white bread?
So let’s dive in and talk about the ingredients in homemade white bread recipe and why they’re important to the recipe:
Bread Flour
The type of flour used in white bread determines the texture, flavor, and overall quality of the bread.
We’re going to use bread flour. Bread flour contains a higher percentage of protein than all-purpose flour, typically around 12-14% compared to 8-11% in all-purpose flour.
The extra protein in bread flour gives the dough more structure and strength, which is important when making bread.
This is because the gluten formed from the protein helps the dough rise and gives the bread its characteristic chewy texture.
Additionally, bread flour absorbs more water than all-purpose flour, which results in a moister and denser crumb.
Yeast
Yeast is a type of fungi that acts as a leavening agent in bread making. It will feeds on sugar and releases carbon dioxide gas, which causes the bread to rise.
There are two types of yeast used in bread making: active dry yeast and instant yeast. Active dry yeast needs to be activated by mixing with warm water and sugar.
Instant yeast can be added directly to the dry ingredients, it can be done either way, but in this recipe, I’m going with active dry yeast.
Salt and Sugar
Salt is added to the dough for flavor and to regulate the fermentation process. It helps control the growth of yeast and strengthens the gluten, which gives the bread structure.
Sugar is added to bread dough to feed the yeast and promote fermentation. It also adds a slight sweetness to the bread.
Water and Milk
Water is the liquid used in bread making. It activates the yeast and hydrates the flour to form a dough. The amount of water used in the recipe can vary depending on the type of flour used, the humidity, and the altitude.
We’re going to mix water along with milk. This will add flavor and richness to the bread. It contains protein and fat, which contribute to a softer crumb and a more tender texture.
Using milk in the yeast activation stage can also give the bread a slightly tangy flavor due to the presence of lactic acid in milk.
Butter
Butter is often used in bread recipes to add richness, flavor, and moisture to the bread. It contains fat, which makes the bread tender and gives it a smooth texture.
Additionally, butter can help extend the shelf life of bread by preventing it from drying out too quickly.
Butter also helps with the rising of the bread by coating the gluten strands and preventing them from sticking together, which allows the bread to rise higher and have a lighter texture.
If you choose to use salted butter, reduce the amount of salt. Rule of thumb is about 1/4 tsp of salt for ever stick of salted butter.
Equipment needed to make white bread at home
Mixing bowl: A large mixing bowl is needed to mix the dough ingredients together. A glass or stainless steel mixing bowl is recommended as it won’t react with acidic ingredients and is easy to clean.
Measuring Scale: Precise measurements are important in bread making. While you can certainly use measure cups and spoons, I recommend using a food scale.
A food scale will measure out your ingredients accurately and precisely. Using the wrong amount of ingredients can affect the texture and taste of the bread.
Thermometer: A thermometer (more specifically, a quick read thermometer) is needed to measure the temperature of the liquid used to activate the yeast.
The temperature should be around 100-110 degrees Fahrenheit, which is the ideal range for activating yeast.
Stand mixer with dough hook: A stand mixer with a dough hook is recommended for mixing the dough.
The dough hook makes it easier to mix and knead the dough, which can be a tiring and time-consuming process if done by hand.
Bread scraper: A bread scraper is a tool used to help shape and move the dough. It’s especially useful when shaping the dough into a ball during the kneading process.
If you’re into sourdough bread making as well, I recommend this bread making kit.
Rolling pin: A rolling pin is needed to roll out the dough to the desired thickness before shaping it into a loaf.
Bread pan: A bread pan is needed to shape the dough into a loaf before baking. It helps the bread to maintain its shape during the baking process.
If you’re interested in making perfectly square slices, check out a Pullman Loaf pan.
Cooling rack: A cooling rack is needed to allow the bread to cool properly after baking. If bread is left to cool on a baking sheet, the bottom can become soggy due to moisture.
Kitchen Linen or Bread Bag: Don’t just store your white bread in a plastic ziplock bag. Use a breathable cloth like a kitchen towel, or bread bag.
This allows your bread to breathe, preventing your bread from drying out in drier climates, and getting moldy in more humid climates.
Serrated Bread Knife: When slicing bread, it is important to use a serrated bread knife. It will prevent you from smashing the bread trying to slice it. If you want even slices, I highly recommend this bread slicing set!
Steps to making homemade white bread
Making white bread from scratch can be a fun and rewarding experience. Will it be perfect every time? Nope.
But following these steps will get you on your way to becoming a bread making machine
Activate the Yeast
The first step in making white bread is to activate the yeast. Combine warm water and milk in a mixing bowl at 100 degrees Fahrenheit and add in the yeast.
Allow the mixture to sit for a few minutes until the yeast has activated and the mixture becomes frothy.
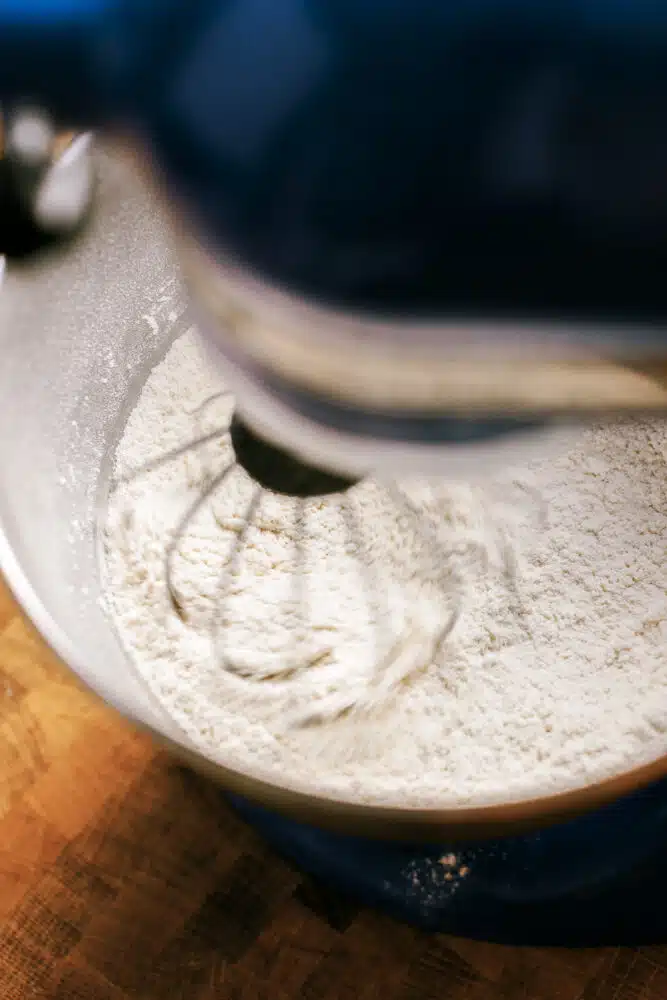
Mix in Dry Ingredients
Next, mix in the dry ingredients such as all-purpose flour, sugar, and salt. Make sure to mix everything thoroughly so that the ingredients are evenly distributed.
I like to use a stand mixer with a whisk.
Mix with a Dough Hook
Swap out the whisk attachment with dough hook to your stand mixer and add in the yeast mixture to the dry ingredients.
Mix everything together on low speed until the dough becomes smooth and elastic.


Add in Butter
Add in room temperature butter, one tablespoon at a time, and mix for an additional 30 seconds. This will help add richness and flavor to the bread.
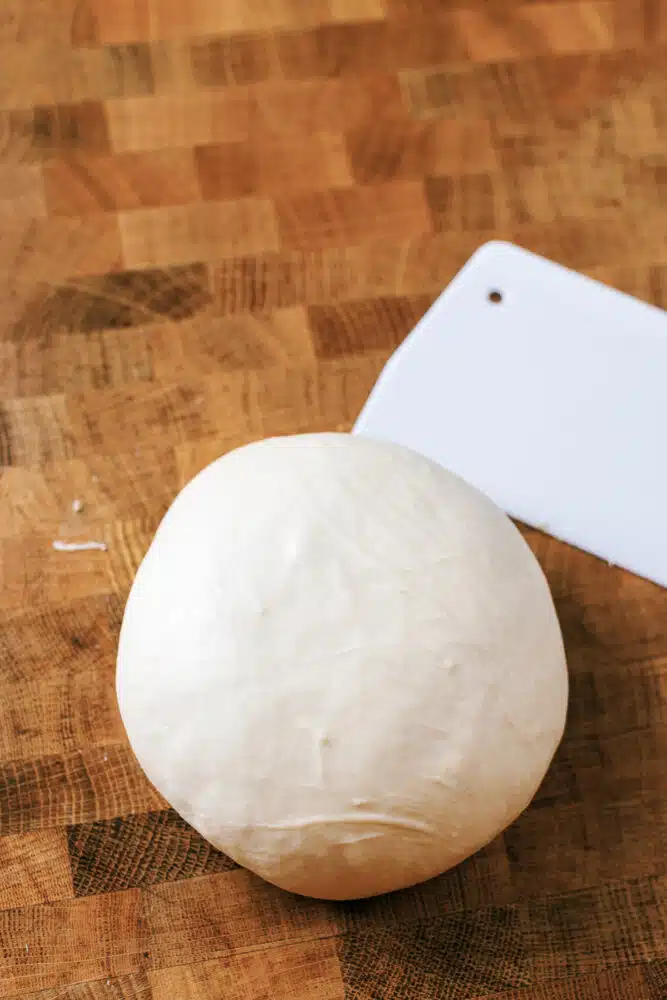
Shape the Dough
Transfer the dough onto an undusted surface and use your hands and a bread scraper to shape it into a ball with a supple surface.
Use a circular motion to roll the dough, folding it over itself until it forms a smooth and round ball. This will help develop the gluten strands in the dough, which will make the bread light and fluffy.
Let the Dough Rise
Place the dough in a greased bowl and cover it with a towel or plastic wrap.
Allow the dough to rise in a warm, draft-free area (or a bread proofer) for about 2 hours, or until it has doubled in size.
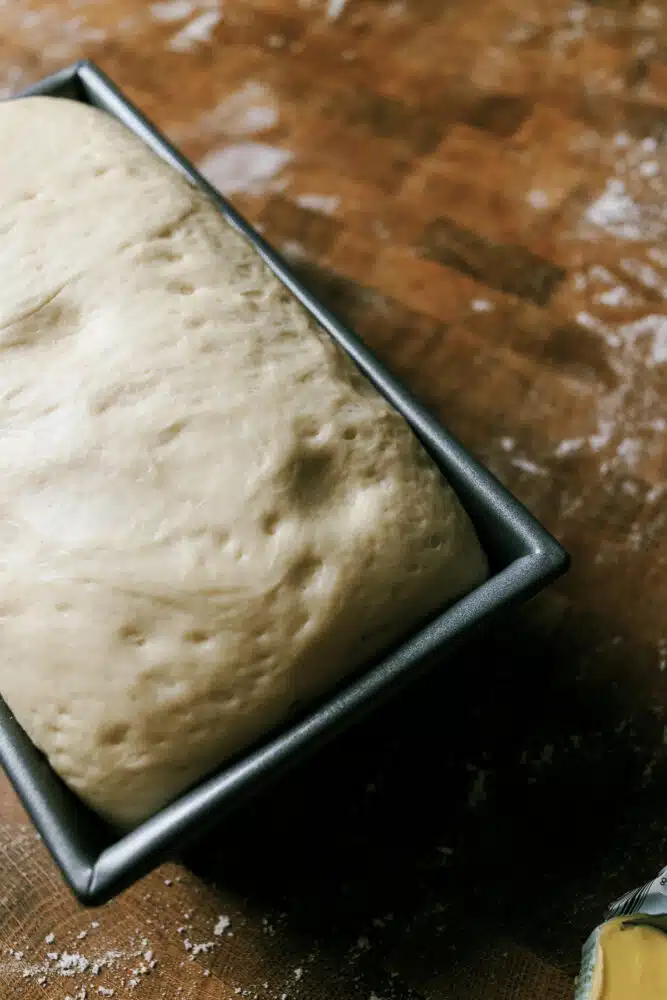
Roll the Dough and Shape It
After the dough has risen, gently deflate it to remove any air bubbles. Roll the dough out with a rolling pin to about 1 inch thickness and make it as wide as your bread pan.
Then, roll the dough up and fold in the sides to fit it into the bread pan. Cover it again and let it rise for about an hour, or until it has risen just above the rim of the pan.


Bake the Bread
Preheat your oven to 350 degrees Fahrenheit and bake the bread for 35-40 minutes, or until it’s golden brown.
You can test the bread for doneness by tapping the bottom of the loaf – if it sounds hollow, then it’s done.
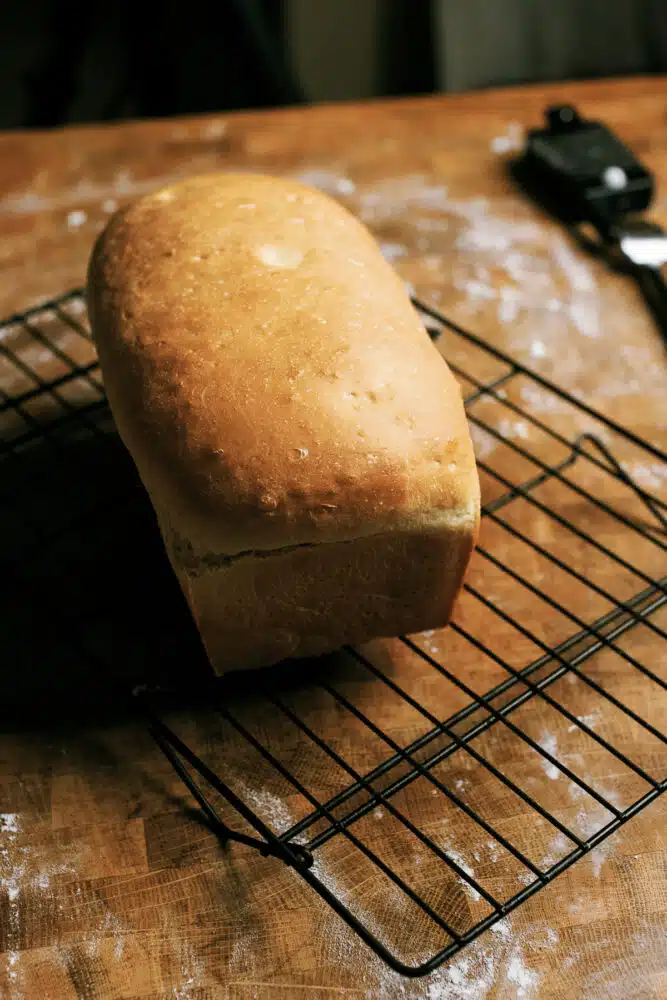
Let the Bread Cool
Once the bread is done, remove it from the oven and let it cool on a wire rack.
It’s important to let the bread cool completely before slicing it, as cutting into it while it’s still warm can cause it to become gummy.
Equipment needed to make homemade white bread
How to check if your white bread is proofed correctly.
When bread dough is proofed well, it will become a “springy”
Gently press your finger into the dough. Use your index or middle finger and press it about half an inch into the dough.
Observe the indentation.
After you’ve pressed your finger into the dough, observe the indentation.
If it springs back slowly and fills in halfway, the bread is perfectly proofed.
Did the indentation spring back quickly and fills in completely? the dough needs more time to proof.
And if it doesn’t spring back at all, the dough has over-proofed.
What can go wrong and how to fix it?
But what happens when things go wrong? Don’t worry, it happens to the best of us. Here’s a few things that can go awry and what you can do to fix the issue.
It may not be fixed during this batch, but you’ll know what to do differently on the next one!
Dough that doesn’t rise
If the dough doesn’t rise, it may be due to using old or inactive yeast or not letting the dough rest in a warm, draft-free area.
To fix this issue: you can try activating new yeast in warm water with a little sugar before adding it to the dough. You can also try placing the dough in a warm area, such as an oven with the light on or on top of the refrigerator, to help promote rising.
Dense or heavy bread
Dense or heavy bread can be caused by not kneading the dough enough, not letting the dough rise enough, or using too much flour.
To fix this issue: try kneading the dough for longer or allowing it to rise for a longer period. You can also try adding a little more liquid to the dough or using a higher protein flour.
I’ve also found during the cold season that it will take longer to proof your bread without something to keep the temperature warmer
Oven with a light on,
Bread Proofer
Instant pot on low yogurt setting with the lid off (keep a damp towel over the bread)
Bread with a hard crust
A hard crust can be caused by baking the bread at too high of a temperature or not covering the bread while it’s proofing, allowing a “skin” to form”.
To fix this issue: try lowering the oven temperature or covering the bread with a damp towel or greased link while it’s proofing.
Bread that collapses or sinks in the middle
Bread that collapses or sinks in the middle can be caused by over proofing the dough, using too much yeast, or not baking the bread long enough.
You can see by these photos this is the issue I had with this batch. But, I decided to run with it for this post until the next batch and will update the photos
To fix this issue: try reducing the amount of yeast used or decreasing the proofing time. You can also try baking the bread for a longer period at a lower temperature.
What to do when you white bread doesn’t turn out?
If your bread doesn’t turn out as expected, don’t be discouraged. Most importantly don’t throw it away!
Even experienced bakers can have failures. Here are a few tips to help salvage a less-than-perfect loaf of bread:
Flatten slices and make a fried PB&J! Seriously. the kids will love them.
Use it for croutons or breadcrumbs
Even if the bread is too dense or has a hard crust, it can still be used for croutons or breadcrumbs.
Simply cut the bread into cubes or pulse it in a food processor to make breadcrumbs.
Toast it
Toasting the bread can help soften a hard crust or make it more palatable. You can also add toppings such as butter, jam melted butter, or cheese to improve the flavor.
Make French toast
If your bread has come out too dense, make French toast! Just soak the bread in a mixture of eggs and milk and then fry it in a pan.
You can add a little cinnamon, nutmeg, sugar, or vanilla extract to the mixture for added flavor.
This is also a good use for stale bread.
Uses for white bread other than a sandwich
While white bread is commonly used for sandwiches, there are many other uses for this versatile bread. Here are a few ideas:
Bread pudding
White bread is perfect for making bread pudding, a popular dessert that’s easy to make. Simply mix bread cubes with a custard mixture and bake in the oven.
Garlic bread
Garlic bread is a popular side dish that’s easy to make with white bread. Simply spread butter and minced garlic on slices of bread and bake in the oven.
Stuffing
White bread is commonly used for making stuffing for Thanksgiving or other holidays. Simply mix bread cubes with onions, celery, broth, and herbs and bake in the oven.
Croutons
Homemade croutons are easy to make with white bread. Simply cut the bread into cubes, toss with olive oil and seasonings, and bake in the oven until crispy. Then toss it in a nice grilled Caesar salad!

Variations of this white bread recipe
There are many different variations of white bread that you can try! Here are a few ideas:
Honey white bread: Add honey to the dough to add a touch of sweetness and a richer flavor.
Whole wheat white bread: Use a combination of white flour and whole wheat flour to make a healthier, heartier loaf of bread.
Gluten-Free: Need this recipe gluten free? Easy! replace flour with a measure for measure Gluten Free flour.
Keto-Friendly: This may be a little tricker than a GF bread as there is so many low-carb flour replacements.
I’ve see store bought Keto breads lean heavily on sunflower flour. But I would start with finding a good measure for measure keto flour to make this an easy variation.
Herb white bread: Add herbs like rosemary, thyme, or oregano to the dough for a savory, aromatic loaf of bread.
Garlic white bread: Add garlic powder or minced garlic to the dough for a delicious, garlicky flavor.
Cheese white bread: Add shredded cheese to the dough for a cheesy, flavorful loaf of bread.
Cinnamon white bread: Add cinnamon and sugar to the dough for a sweet, aromatic loaf of bread that’s perfect for breakfast or dessert.
Nut white bread: Add chopped nuts like almonds, walnuts, or pecans to the dough for a crunchy, nutty flavor.
Dried fruit white bread: Add dried fruit like raisins, cranberries, or apricots to the dough for a sweet, chewy loaf of bread.
These are just a few examples of the many variations you can try when making white bread.
Get creative and experiment with different flavors and ingredients to create your own unique loaf of bread.
Be sure to give me a tag on IG @dadwithapan and share your creation! I’d love to see what you come up with!

Light and Fluffy white bread
Equipment
Ingredients
- 3/4 cup water
- 1/2 cup milk
- 1 package yeast
- 1 tablespoons sugar
- 1 1/2 teaspoons salt
- 3 cups bread flour
- 3 tablespoons unsalted butter at room temperature
Instructions
- In a small saucepan, heat the water and milk together until they reach a temperature of 100 degrees F (37 degrees C).3/4 cup water, 1/2 cup milk
- Pour the warm water and milk mixture into a large mixing bowl. Add the yeast gently to combine. Let the mixture sit for about 10 minutes until the yeast is activated and the mixture is foamy.1 package yeast
- Add the salt, sugar and bread flour to the mixing bowl of the stand mixer. Use the whisk attachment to combine on low; about 3 seconds1 1/2 teaspoons salt, 3 cups bread flour, 1 tablespoons sugar
- Attach a dough hook to a stand mixer, and gradually add the flour mixture to the mixing bowl while the mixer is running on low speed. Mix until the dough is smooth and elastic, about 5-7 minutes.
- Add the butter to the mixing bowl one tablespoon at a time, mixing until butter is incorporated each time; Mix for another 30 seconds after all butter is mixed.3 tablespoons unsalted butter
- Place the dough onto non-floured surface. use your hands and a bench scraper to begin rolling the dough into a smooth ball. Place the dough into a greased bowl, cover with a damp towel, and let it rise in a warm place for 2 hours or until it has doubled in size.
- Once the dough has risen, punch it down and turn it out onto a floured surface. Roll it out into a rectangle that is the same length as your bread pan, and about 1 inch thick.
- Starting from the shorter end, roll the dough up into a tight cylinder. Pinch the seams and ends to seal.
- Place the dough seam-side down into a greased bread pan. Cover with a damp towel and let it rise in a warm place for 1 hour or until it has risen to the top of the pan.
- Preheat the oven to 350 degrees F (175 degrees C).
- Bake the bread for 35-40 minutes or until the crust is golden brown and the bread sounds hollow when tapped.
- Remove the bread from the oven and let it cool in the pan for 10 minutes. Turn it out onto a wire rack and let it cool completely before slicing and serving.

