
No Bake Raspberry Cheesecake – Freezer Friendly

Summer is here, and like our kids, the oven is on vacation too. But you’re craving cheesecake.. Like.. bad.
And if you’re like me, you have a guilty pleasure for eating cheesecake frozen. So look no further friend, because this is where it’s at!
I’m putting together this recipe with a little raspberry reduction swirled in on top, and eating it straight out of the freezer. It’s the perfect summer dessert!
Ingredients for No-Bake Raspberry Cheesecake
Let’s get to the ingredients first. There’s not many, so make them count!
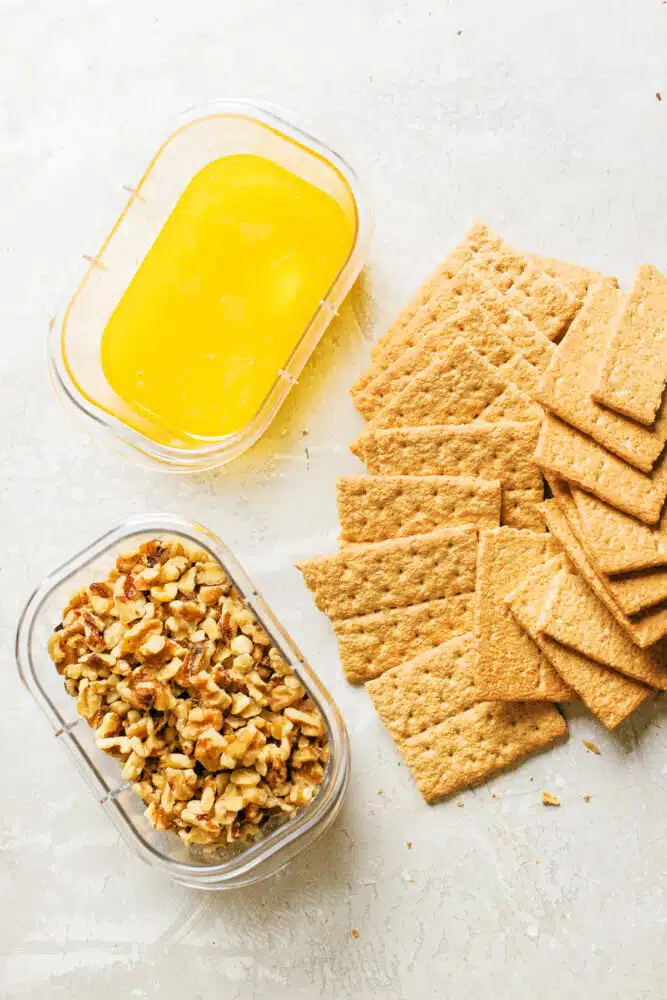
a graham crackers – Like any good cheesecake, you gotta have a graham cracker crust.
Walnuts – Since this isn’t being baked, I’m adding some walnuts into the crust to add a
little crunch to the crust, but this is up to you
Melted butter – This binds our crumbs together, creating a firm crust to hold the
cheesecake filling.
Sugar – I’d almost suggest this is optional. I accidentally forgot the sugar on the first
batch, and it came out just fine. At most, just a touch for your crust.
Cream cheese, softened – I mean, duh.. how else are you going to add that rich and
tangy flavor to a cheesecake?
One teaspoon of pure vanilla extract – An essential background flavor that enhances
the overall sweetness of the dessert.
Whipped Topping – Not whipped cream, but whipped topping. That stuff in the tub in
the freezer. This will keep your cheesecake mixture from crystalizing in the freezer.
Condensed Milk – This along with the whipped topping, helps provide a texture that is
consistent with a baked cheesecake.
One cup of fresh raspberries – Boiled down and blended with a little water and sugar,
so we can swirl it into the cheesecake. Adds an amazing flavor to your cheesecake!
Equipment needed
Not much is needed here. But if you want to make life easier, here are some suggestions:
Food processor – To easily make your crust without killing your wrist, blending your crust ingredients will be done in seconds with a good food processor.
Stand mixer – An electric mixer works too, but either way, you’ll want some sort of mixer to get your cheesecake mixture nice a smooth
Rubbermaid Brilliance Food Storage Containers- I LOVE my Rubbermaid food containers, because they’re not only great to store leftovers or prepped food, but perfect for this no-bake recipe.
One less dish to clean too!
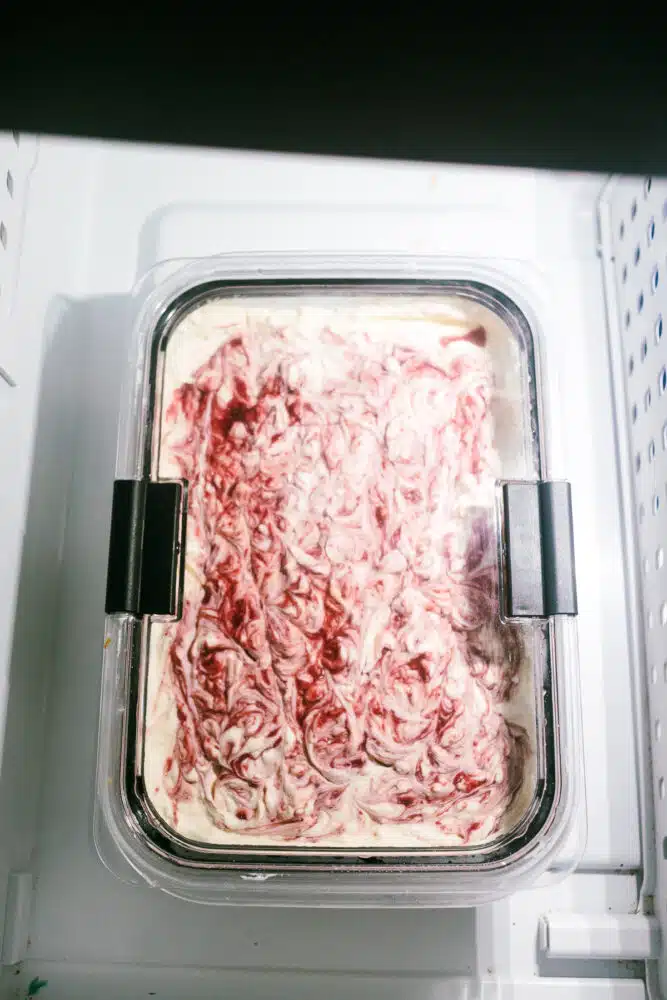
Rubbermaid’s Brilliance line of Food Containers are dishwasher, microwave, and freezer-safe making it perfect to store items directly in the freezer and serve straight out of them.
And let’s say you wanted to convert this to a baked cheesecake. You can still prepare this ahead of time, store it in the freezer in a glass Brilliance Food Storage container, remove the airtight lid, and take it straight to the oven!
Specifically for this recipe, I recommend the Brilliance Large Food Storage Container. The Raspberry Swirl
Don’t over think this – simply boil down some fresh raspberries in a little watch and sugar (even honey will work) until its broken down.
Let it reduce for a few minutes and let it sit.
And if you want to prevent seeds all over the place in your cheesecake, give it a quick blend to smooth it out. Plus, it gets a more vibrant color this way
Don’t want to go through this step? Replace this with some raspberry jam!
Tips and Tricks
This is such a fun and easy recipe. Not much too it, but here’s a couple pointers:
- Cream cheese consistency matters: Always ensure your cream cheese is at room temperature before you start. This will give you a smoother, lump-free filling, creating the perfect cheesecake texture.
- Chill the crust: The crust sets better and faster if it’s chilled before adding the filling. So, while you prepare the rest of the ingredients, let the crust sit in the refrigerator.
- Perfecting the swirl: For the beautiful raspberry swirl effect, remember not to over mix the raspberry jam with the cream cheese filling. We’re looking for a delightful swirl of color, not a uniform pink.
- Patience is a virtue, especially in cooking: Once assembled, the cheesecake needs to be set in the freezer for a few hours, or better yet overnight. It might be hard to resist, but good things come to those who wait!
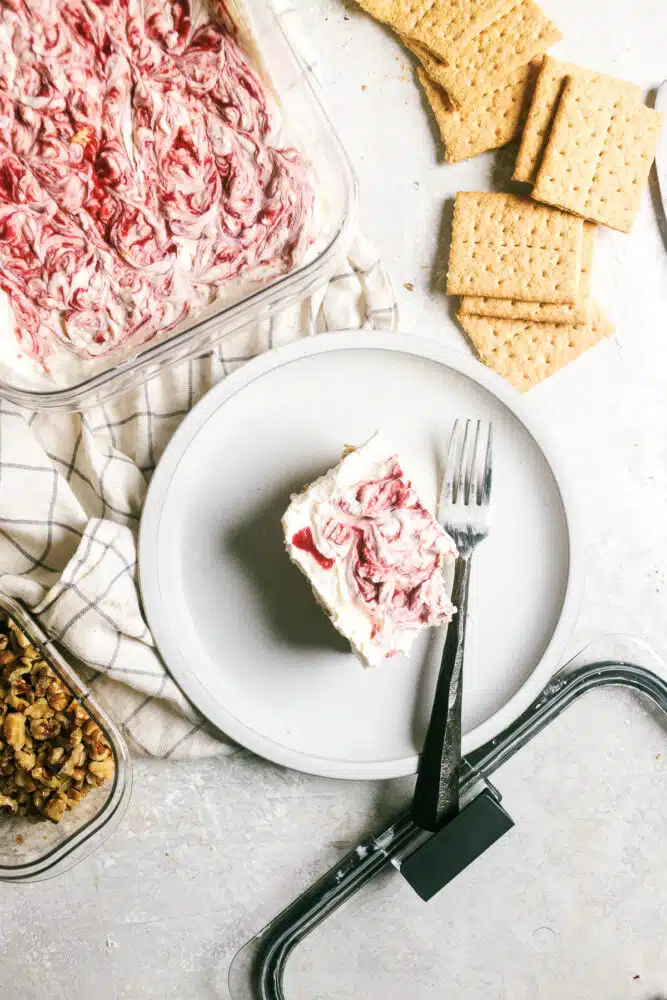
Why this is the Ultimate Summer Dessert Sure, there’s all sorts of summer desserts you can make, but this one has a special place in my heart for several reasons. - Oven-free cooking: This cheesecake has a baked-without-being-baked feel to it, and it keeps your kitchen cool, and one less reason to hear dad ask who touched that thermostat!
- Cool and refreshing: Served straight from the freezer, this dessert is an excellent way to cool off on hot summer days. This is a favorite with Kenzie, she thinks it tastes just like ice cream cake!
- Seasonal delights: Raspberries are at their juiciest best during summer, making this the perfect time to incorporate them into your desserts.
- Ease of preparation: Despite its gourmet appeal, this cheesecake is surprisingly easy to make, giving you more time to enjoy the summer sun.
- Perfect for planning ahead: Given that this cheesecake needs time to set in the freezer, you can prepare it in advance of any summer parties or family gatherings. No last-minute dessert stress!
This is without a doubt on rotation on my summer dessert playlist. It’s quick to prep, easy to make, and with the help of Rubbermaid’s Brilliance Food Storage Containers, easy to store and prep!

No Bake Cheesecake with raspberry swirl
Ingredients
- 8 graham crackers
- 3/4 cup walnuts
- 1/2 cup unsalted butter melted
- 1/2 cup sugar separated into 1/4 cups
- 16 oz cream cheese room temperature
- 8 oz Frozen Whipped Topping thawed
- 1 teaspoon pure vanilla extract
- 1 can condensed milk
- 1 cup fresh raspberries
- 1/2 cup water
Instructions
- In a small pan, reduce raspberries in water and sugar, until a sauce is formed. Blend until smooth and set aside in the refrigerator.
- Mix the graham cracker and walnuts with the melted butter in a food processer until well combined. Press this mixture firmly into the bottom of a large Rubbermaid Brilliance Food Storage Container. With a piece of wax paper on top, press down the crumb mixture until it evenly lines the bottom of the container. Place it in the fridge to chill while you prepare the filling.
- In a large mixing bowl, beat the cream cheese, condensed milk, whipped topping, and vanilla extract with an electric mixer, or stand mixer until it’s smooth and creamy.
- Pour the cream cheese filling over the chilled crust and spread it out evenly. spoon over the raspberry filling in teaspoon portions, then use a toothpick to swirl it through the cheesecake.
- Cover your brilliance Food Storage Container with its airtight lid and store in the freezer overnight.
- When ready to serve, remove from the freezer 15 minutes before serving so it’s easier to cut. Enjoy!